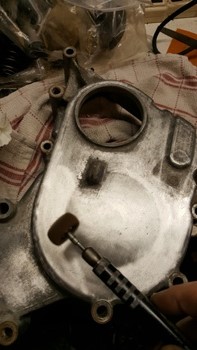
Front Cover (6 May 2017)
The front cover was pretty dirty. The U20 has an aluminum cover which can be cleaned and polished up nicely. I used a soft brush on a dremel and some light polish to bring a dull shine to the cover. I also removed the two threaded studs from the cover. The studs go through the head, which means if you ever need to service the front you end up having to remove the head, by removing the studs the front cover can be slid forward and removed.
Front Cover Bolts (6 May 2017)
The front cover bolts were very rusty. Part of the issue is the location by the water pump and differences in metals at contact. The bolts are various sizes as they serve other purposes like attaching the water pump and the alternator bracket support housing. I have a large plating station in my garage but for quick simple bolts I have found Eastwoods home plater does just fine for small parts like bolts.
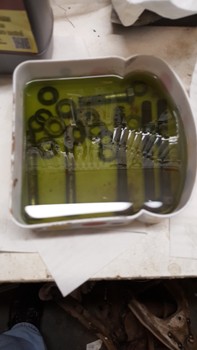
Bolts Soaking (6 May 2017)
After wire brushing the major rust off of each front cover bolt, I let them soak in Evaporust overnight.
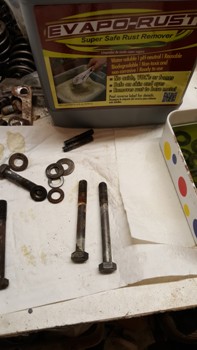
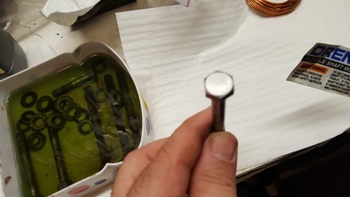
First Bolt Cleaning (7 May 2017)
The bolt on the right has soaked in Evaporust overnight. You can see the product cleans as advertised.


Electro Plating (7 May 2017)
I plated each bolt individually with the Eastwood kit.
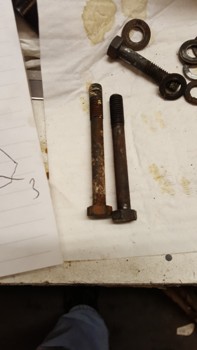
Before and After (7 May 2007)
Top bolt after all steps and the bottom bolt is how they started.

Final Product (7 May 2017)
This is an example of the final product of re-plating the front bolts. They cleaned up very nicely and with all new parts having the bolts cleaned up adds to the overall restoration.
Timing Marks (13 May 2017)
I bought a rebuilt front dampner from Dean. If all the timing chains are set up are correctly at TDC the 0 degree mark should be dead on as shown.


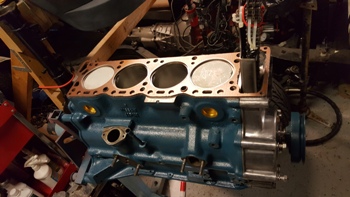
Head Gasket Test Fit (13 May 2017)
I tested the head gasket to make sure everything is lined up and correct as well as checked the head installed height.
Gear Alignment (13 May 2017)
Final checks for the head install. You can see the two front studs are missing from the front cover.
Copper Coat (13 May 2017)
Although not necessary for the type of head gasket I bought, I like to use a small spray of copper coat to keep everything in place and provide a small filler for any imperfections.
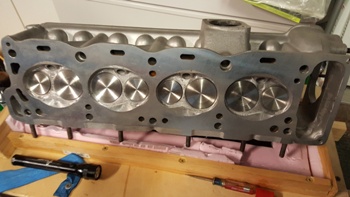
Rebello Head (13 May 2017)
Since it took so long to source a non smog head I wanted it to be built to the best I could, so I sent it to Rebello Racing in California. Rebello specializes in Datsun engines and has a spec sheet for the U20 head. They install oversize valves and have a specialized cam grind. The head really looks great and should wake my engine up.
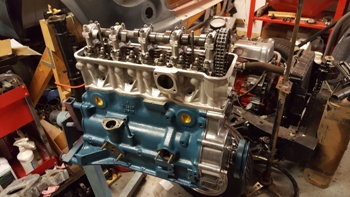
Head On (13 May 2017)
I bolted the head up using Deans stud kit. I removed the rockers to make sure I could line the cam sprocket up. I will install them and set the cold lash per Rebellos suggestion.
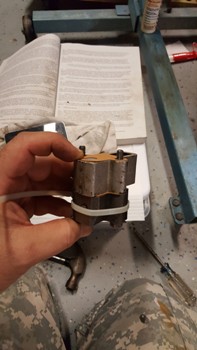
Upper Tensioner (14 May 2017)
The upper tensioner is crucial to keeping the chain tight and once the engine is running is pushed out with oil pressure. When installing the gasket you have to ensure the oil hole is not blocked.
Installing Upper Tensioner (14 May 2017)
To install the tensioner I zip tied the entire assembly closed and lowered into position.
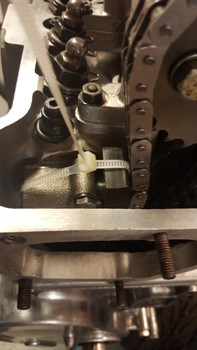
Tensioner In (14 May 2017)
Here you can see the tensioner with a spacer installed. This keeps the shoe pushed out and keeps tension on the chain until oil pressure starts. After the tensioner is installed you just cut the zip tie and the assembly is complete.
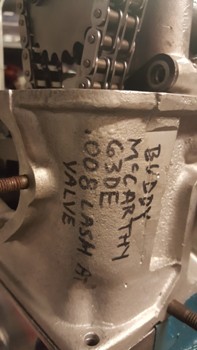

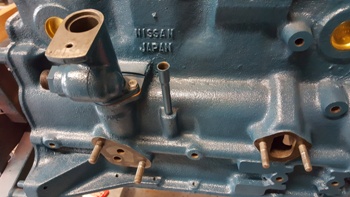
Rebello Head (14 May 2017)
This is the Rebello markings for their 63DE U20 head. Also, a great shot of the front corner where the front cover stud would normally be. I will install bolts from the top allowing front cover removal without head removal should the need arise.
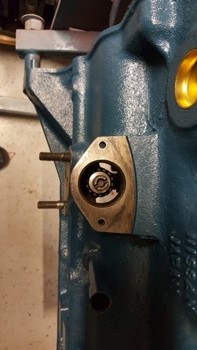
Oil Pump (20 May 2017)
The U20 gasket kit comes with everything needed to service the oil pump. As long as the two gears are not worn the oil pump is easy to service.

Dizzy Drive (20 May 2017)
The next step is drop in the dizzy drive gear. The gear rotates as it engages the jackshaft. The goal is to have it land at about 11:25 with the small section forward.
Dizzy Drive 1 tooth (20 May 2017)
I moved the gear by one tooth to show what a difference it can make in final gear orientation.

Dizzy Stand (20 May 2017)
To keep the dizzy drive gear in place prior to flipping the motor over I installed the dizzy stand to lock the gear in place.
Oil Filter Bracket (21 May 2017)
A quick sanding and polishing and the oil filter bracket was ready for the engine.

Oil Filter Bracket On (21 May 2017)
Filter mount installed. There is a anti drain back tube that installs in the center and I will install it when the filter goes on.
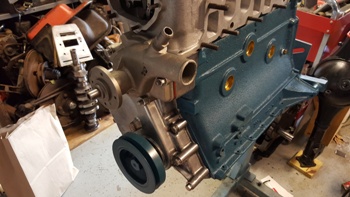
NOS Water Pump (21 May 2017)
Installed a new water pump so I could tighten up a few of the bolts on the front cover.